Jaws Deploy is your go-to platform for streamlining continuous deployments, making it easy to orchestrate releases across environments without the hassle of complex setups. Whether you're handling on-prem servers or cloud targets, Jaws focuses on the essentials: reliable automation, reusable logic, and seamless CI/CD integration—all at a fraction of the cost of heavier tools.
If you're coming from a CI tool like TeamCity or Jenkins, Jaws picks up where they leave off, handling the "deploy" part with features like variable scoping and lifecycle progression. Let's get you up and running quickly.
Step 1: Create Your Account and Workspace
Head to https://app.jawsdeploy.net/signup to sign up—it's free to start with the Starter plan. Once logged in, you'll land in your default "Main" workspace. This is your isolated space for grouping projects, machines, and variables. If you need more workspaces (e.g., for different teams), create them under Settings.
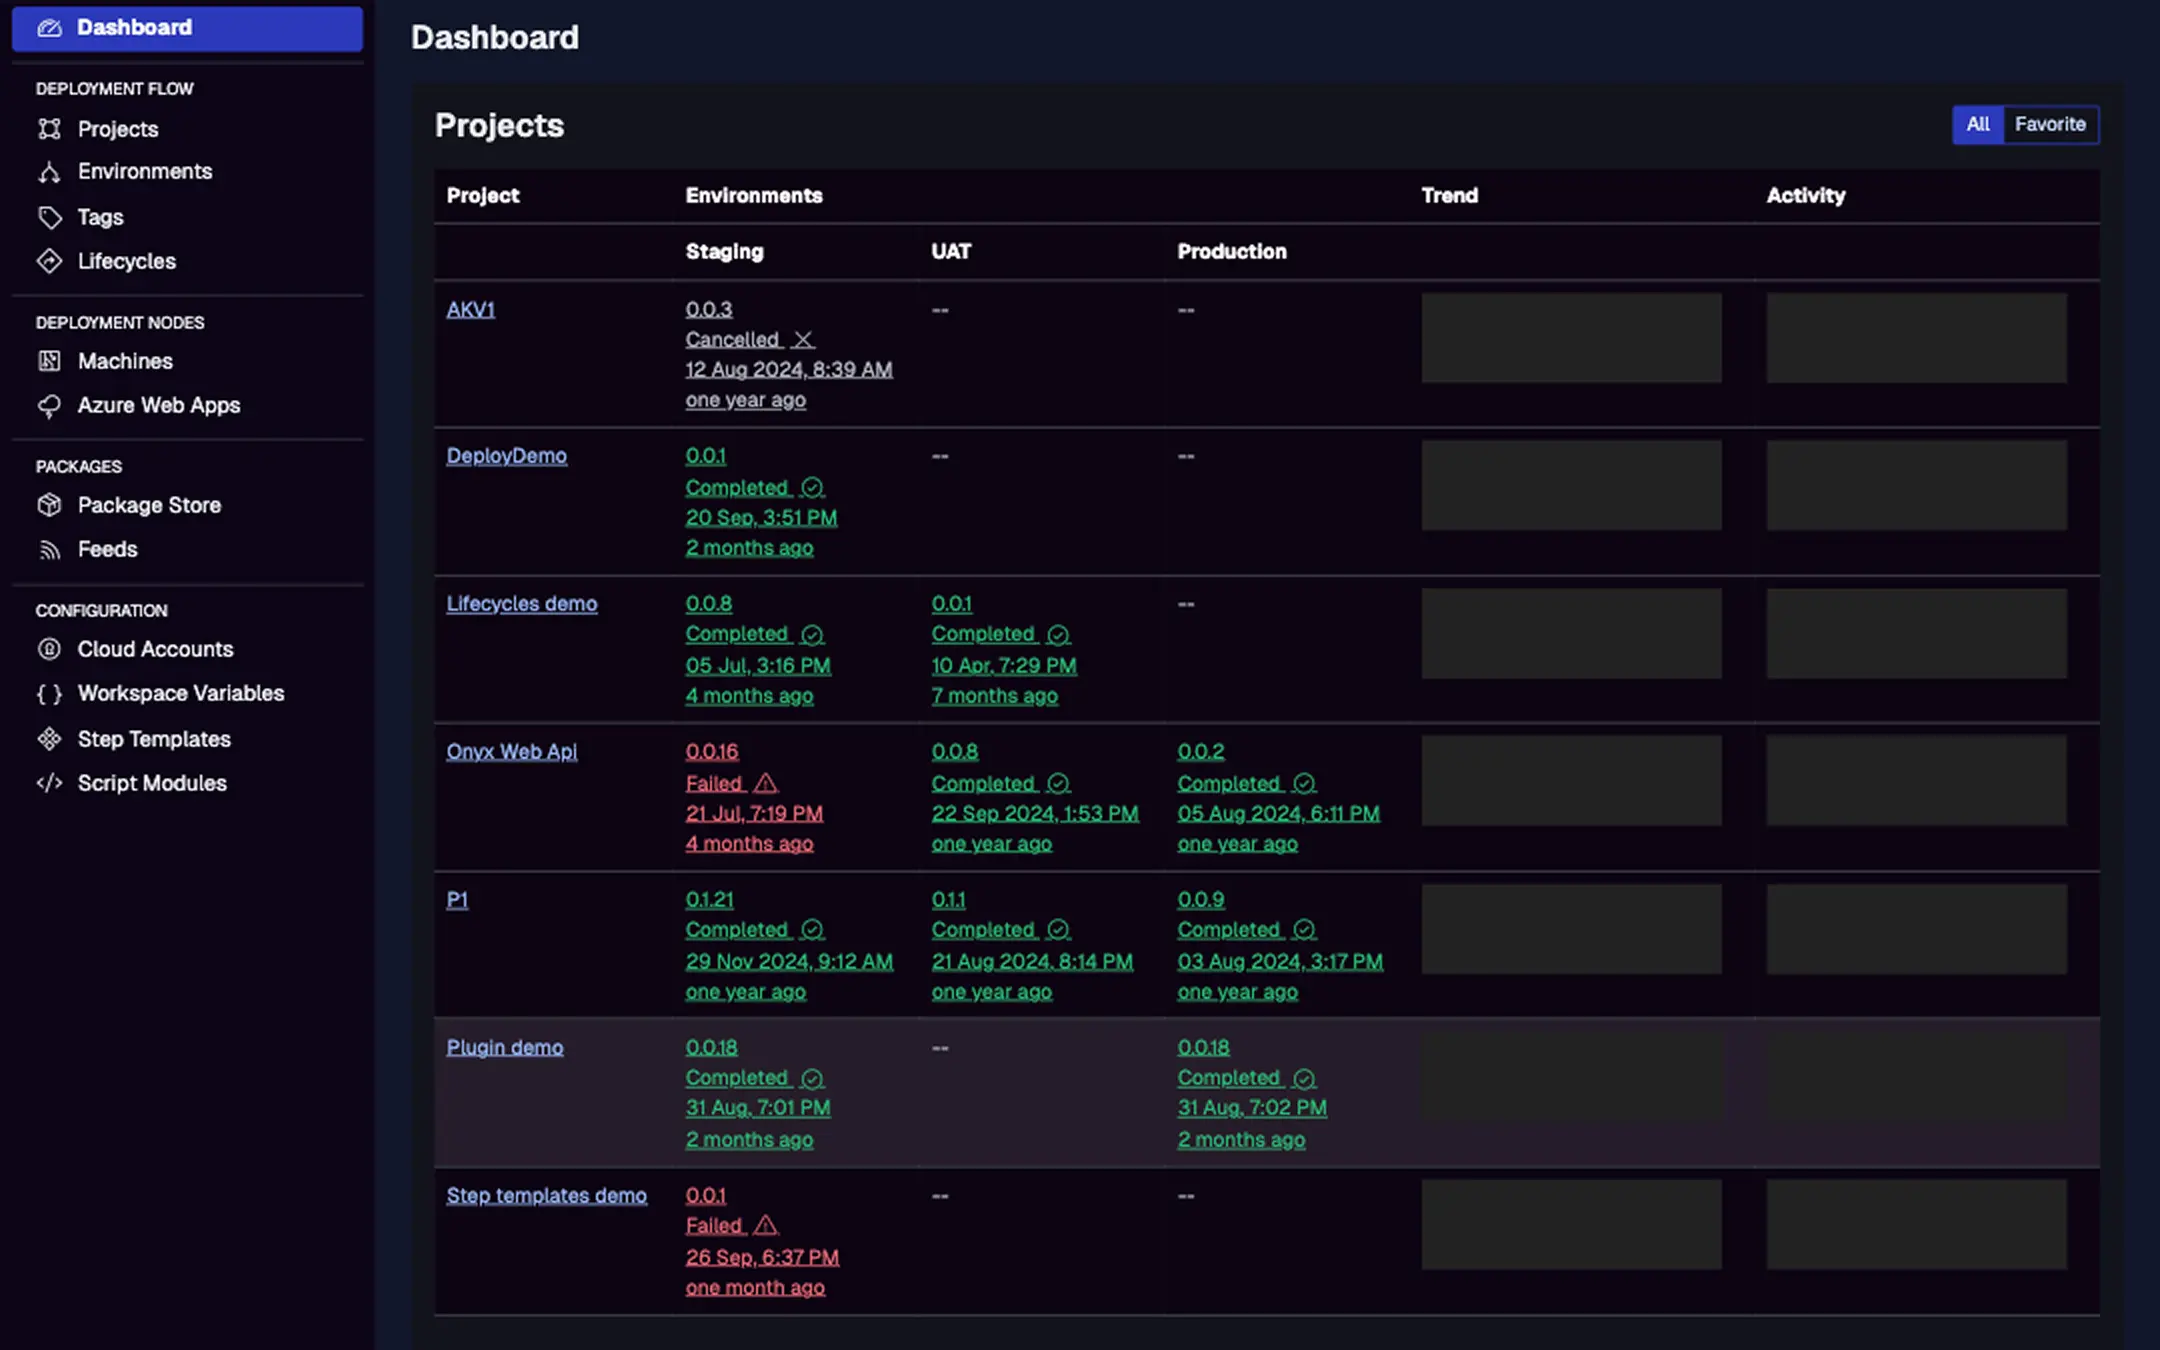
This shows the main dashboard with projects listed, recent deployments, and activity trends. Use the search bar to filter projects quickly.
Step 2: Set Up Environments
Environments represent your deployment stages, like "Staging" and "Production." From the left menu, go to Environments and add them. Assign machines or cloud targets to these later for targeted deploys.
Tip: Start simple with two environments to test progression rules via lifecycles.
Step 3: Add a Machine or Cloud Target
- For on-prem or VM targets: Install the Jaws Deploy Agent (a lightweight service) on your server. Download the install script from the Machines page, run it with admin privileges, and accept the handshake in the app. Supported on Windows (as a service) and Linux (via systemd).
- For cloud: Add targets like Azure Web Apps under Cloud Targets. Link your Azure credentials via Cloud Accounts first.
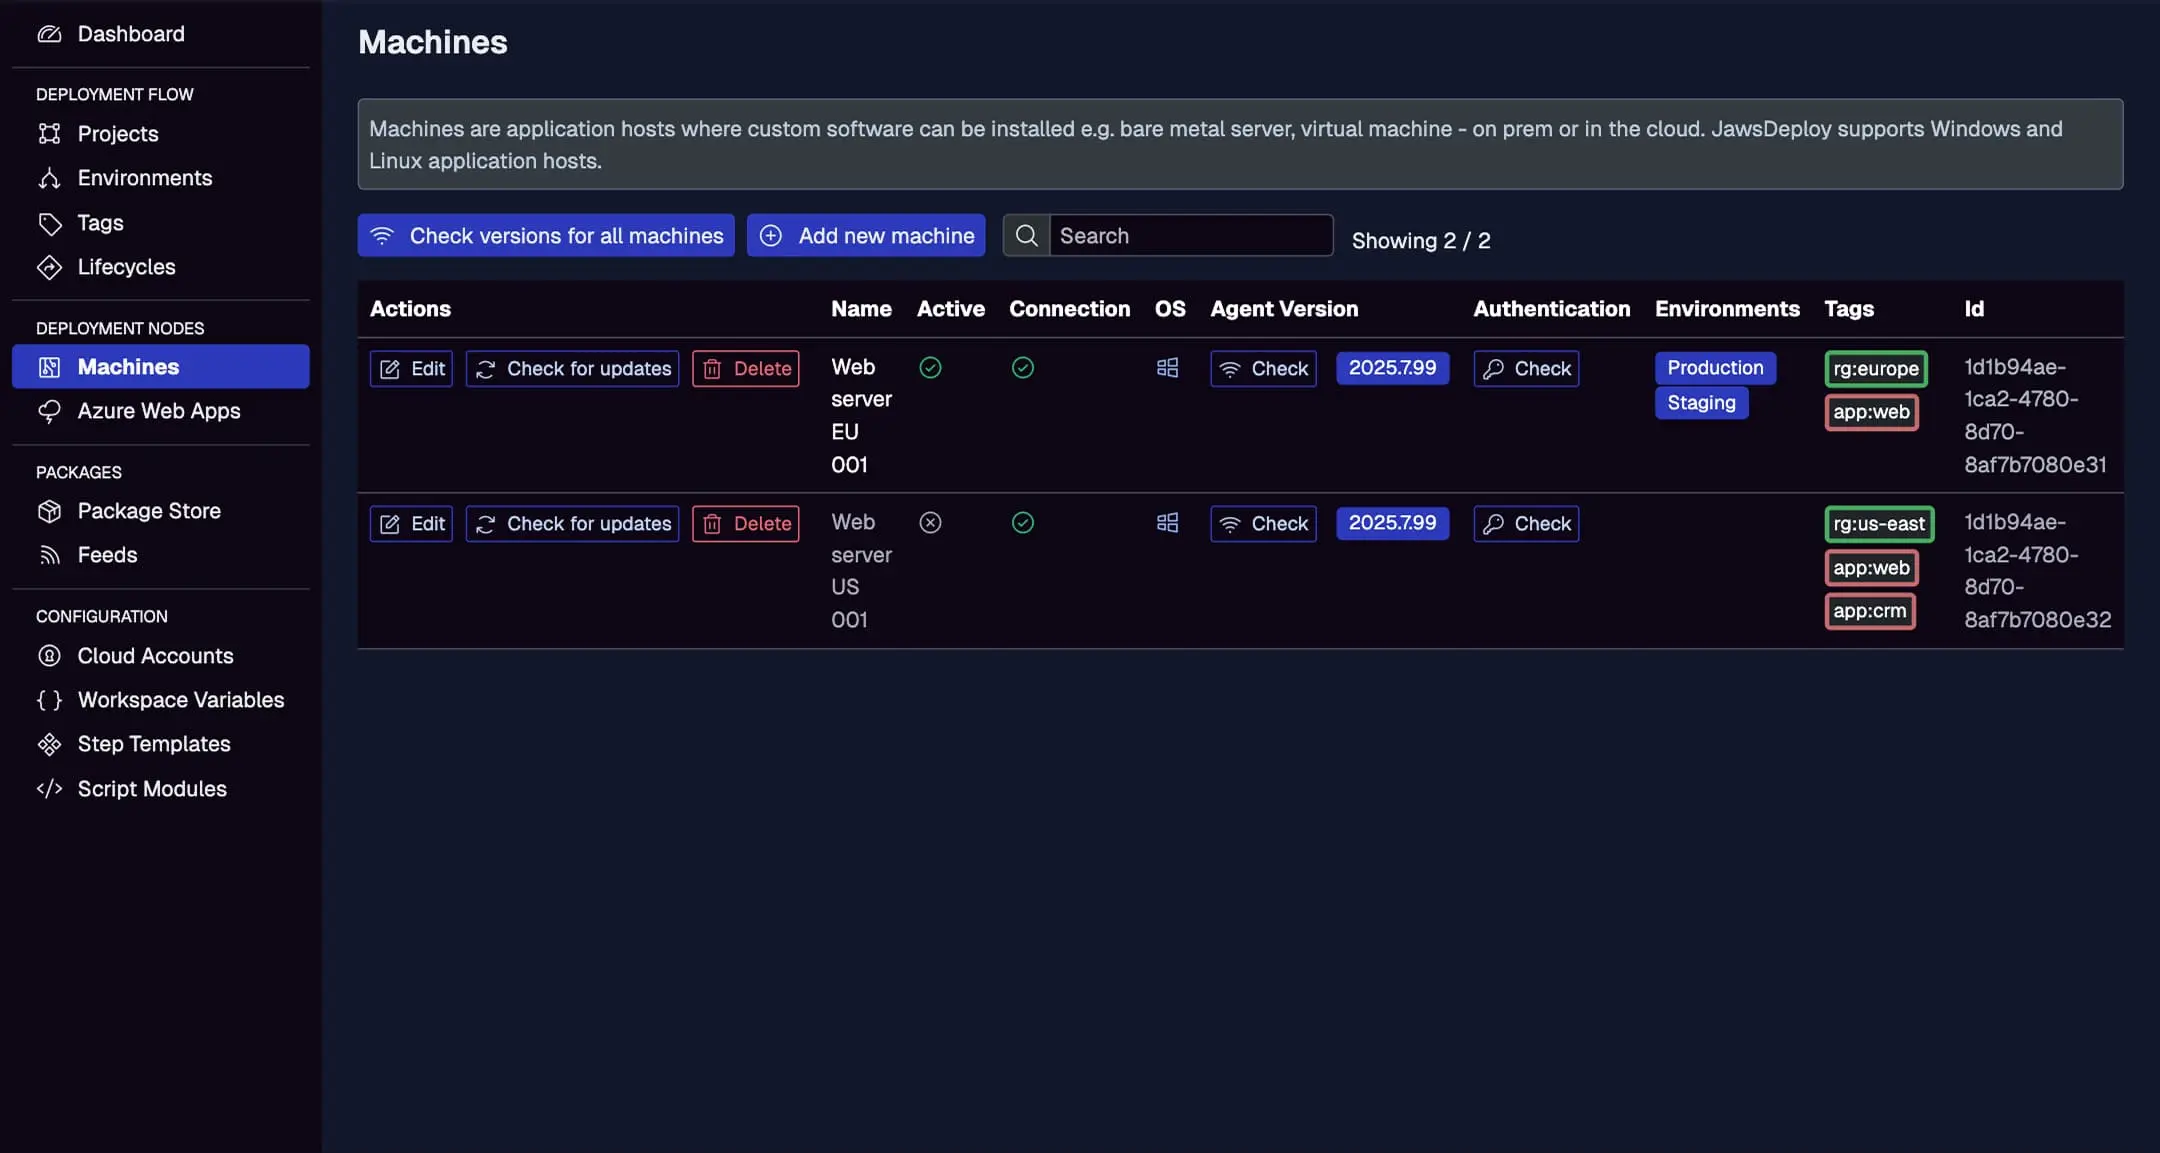
Here, you'll see active machines with connection status, OS, agent version, environments, and tags. Check for updates or delete unused ones from this view.
Step 4: Create Your First Project
From the Projects page, click "Add new project." Name it (e.g., "Demo App"), add a description, and define steps—like "Run Script" for a PowerShell hello world or "Deploy Package" for uploading a .zip.
Upload a sample package to the Package Store (e.g., a demo .zip) and reference it in your step.
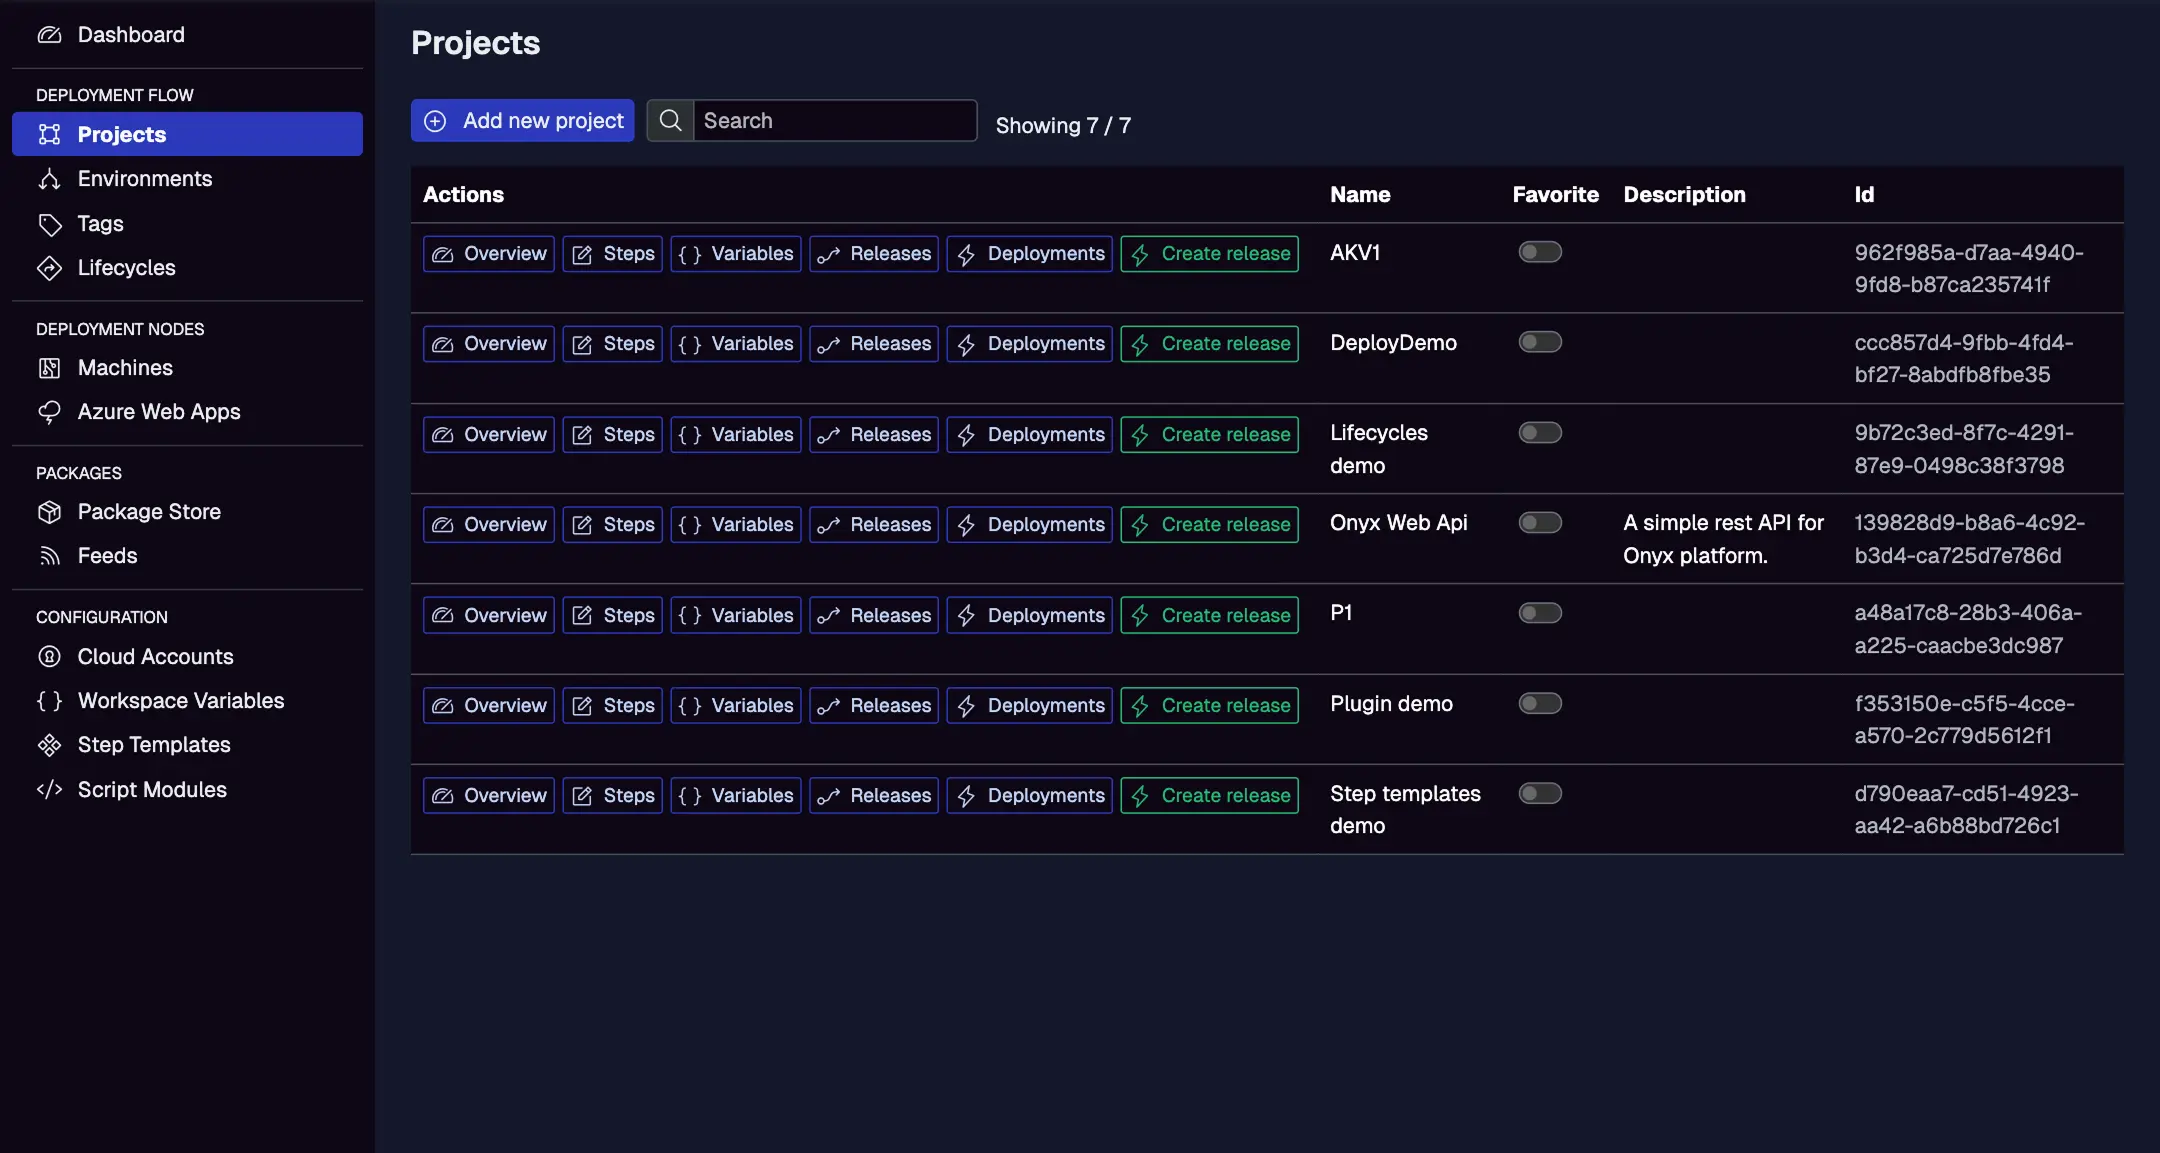
This displays all projects with IDs, descriptions, and quick links to steps, variables, releases, and deployments.
Step 5: Define Variables and Deploy
Add a project variable (e.g., "AppPath") scoped to environments for custom paths. Create a release (SemVer versioned), then deploy to "Staging." Monitor live logs and status on the Deployments tab.
View version info, creation time, lifecycle, and deployment history with statuses, durations, and triggers.

Success! Your first deployment is live. For troubleshooting, check the logs. Next, explore integrations to automate from your CI tool.