Lifecycles and Channels are two concepts in JawsDeploy which provide precise control over order and conditions under which a release can be deployed to an environment.
Let’s get straight to a real-world example which illustrates these concepts. Consider a setup where a single project has the following requirements:
- When release is created an automatic deployment to Staging environment is triggered.
- Only when that deployment is completed without errors (warnings are allowed) the release may be deployed manually (via GUI or API) to UAT environment.
- Only once UAT deployment is completed without any errors or warnings - it is possible to deploy the release to production. Note that UAT can be deployed only after Staging with no errors - so Production deployment requires:
- Staging deployment without errors
- UAT deployment without errors or warnings - At the same time it should be possible to deploy directly to UAT because this project often is released preview releases.
To enforce above rules we’ll create 2 lifecycles. Let’s start by going to the lifecycles page under https://app.jawsdeploy.net/w/[workspace]/lifecycles.
Give the lifecycles friendly names e.g. “Standard Lifecycle” for the Staging-UAT-Production one and “Feature Preview” for the UAT-only lifecycle. Configure the phases as follows:
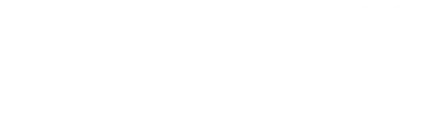
- Standard lifecycle
- Phase 1: Staging (automatic); require all environments; allow warnings.
- Phase 2: UAT (manual); require all environments; require no errors or warnings.
- Phase 3: Production (manually); require all environments; require no errors or warnings.
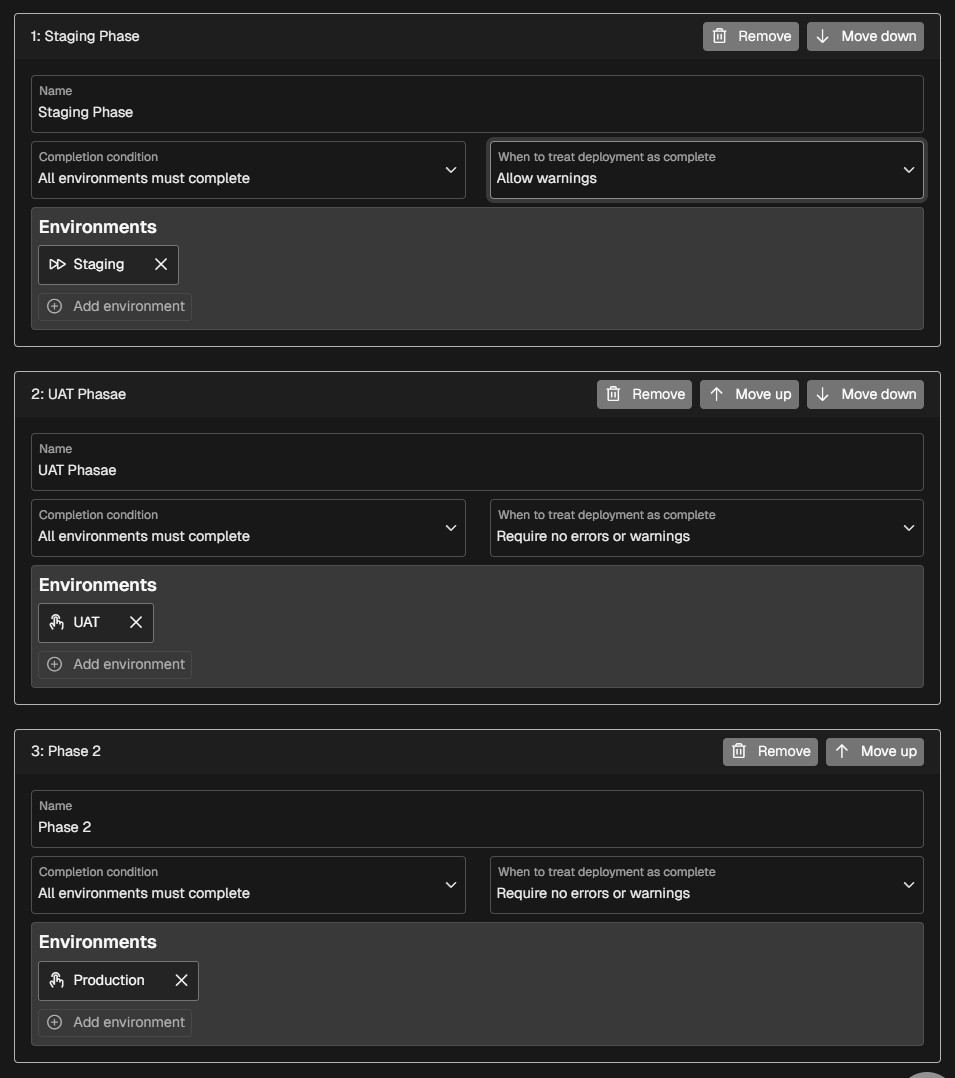
- Feature preview lifecycle
- Phase 1: UAT (manual); require all environments; require no errors or warnings
Then navigate to your project page and open “Channels” tab, create 2 channels, one for each of lifecycles we just created.
Once the channels are saved, creating a release allows you to select specific channel (which is optional, it is still possible to create channel-less release and deploy to environments at will).
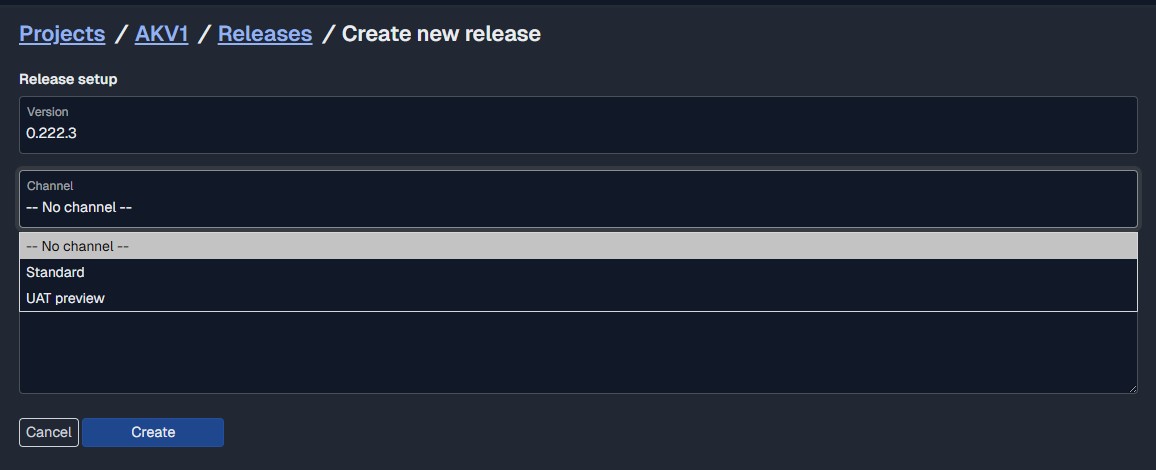
Right now depending on what release behavior is required - appropriate channels should be selected (depending on whether it is a typical production release, or a feature preview release).
Because Staging environment was specified as Automatic, a deployment will be triggered immediately after creating the release, which can be observed on the release page. Note also the detailed release progression preview in the right pane. It includes phase completion and recent deployment information.
When Staging deployment completes successfully then the second phase becomes available, marked in blue. Still the final Production phase is not available and a deployment to Production is not possible. If you try deploying it via API - a 4xx error will be returned.
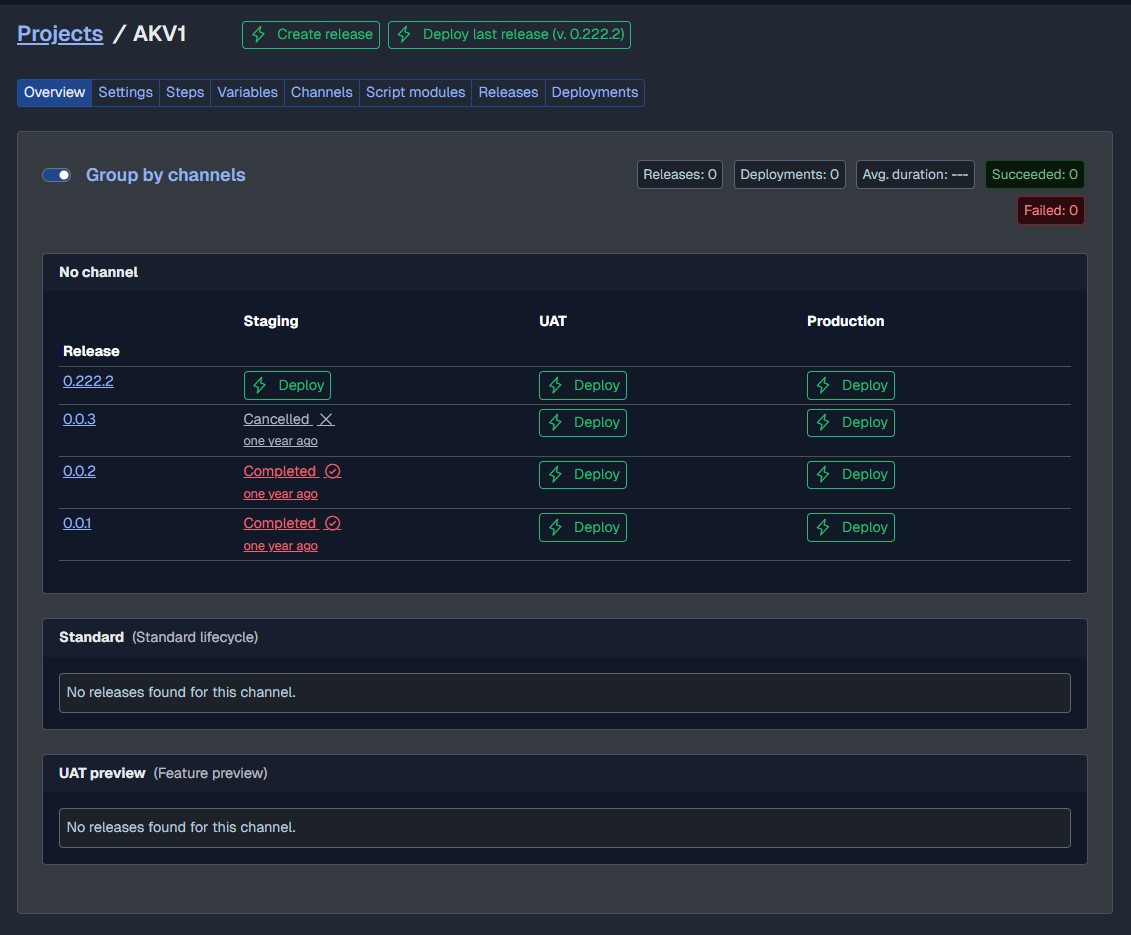
Channel-aware projects also get a per-channel overview in addition to standard dashboard. Project page with “Group by channels” toggle enabled:
Now anytime you wish to just deploy to UAT with a feature preview - select “Features channel” channel when creating a release and deploy (manually) to UAT without deploying to Staging. Here is the release screen presenting this use-case:
More advanced scenarios:
- It is possible to add more environments to a phase with different modes - Manual and Automatic. Automatic ones will be triggered by the system, Manual ones still require human intervention or an API call.
- If a phase contains 2 environments, with 1 automatic, and the completion condition is set to “All” then the automatic trigger will not mark the phase as complete. A deployment to the other environment will be required to complete the phase.
- If the same phase completion condition is changed to “Minimum 1 environment must complete” - then automatic trigger may mark the phase as complete, and make the next phase as available.
- A phase which is marked as “Optional” in the “Completion condition” field is considered complete by default.
- If such phase is the first phase of a lifecycle - automatically the first optional phase and the one immediately following it will become available.
- If such phase follows another non-optional phase - it will become available when all previous phases are completed, and also the phase that immediately follows the optional phase will become available. - Optional phases are marked with dotted borders in the progression preview.